User roles are essential for managing access and permissions within a website in WordPress. Each user role comes with its own set of capabilities, determining what actions users can perform on the site. Please take a moment to read our tutorial below on user roles in WordPress.
WordPress user roles
- Administrator: This role has complete control over the website, including the ability to manage other users, install plugins and themes, and modify settings.
- Editor: Editors can publish, edit, and delete any post or page on the site. They also have access to moderate comments and manage categories.
- Author: Authors can write, edit, publish, and delete their own posts. They cannot modify posts created by other users.
- Contributor: Contributors can write and edit their own posts, but they cannot publish them. Instead, their posts must be reviewed and published by an editor or administrator.
- Subscriber: Subscribers can only manage their own profiles and leave comments on the site.
How to set user roles in WordPress?
- Access Your WordPress Dashboard: Log in to your WordPress website using your administrator credentials.
- Navigate to the Users Section: Once logged in, find and click on the “Users” tab on the left-hand side of the WordPress dashboard. This will open the Users page where you can manage user accounts and roles.
- View Existing Users: On the Users page, you’ll see a list of all existing user accounts on your WordPress site along with their respective roles.
- Add a New User: If you need to add a new user, click on the “Add New” button at the top of the Users page. Fill in the required fields such as username, email address, and password for the new user.
- Assign User Role: Below the user information fields, you’ll find the “Role” dropdown menu. Choose the role that best suits the permissions you want to grant to the user.
- Customize User Roles (Optional): If the default user roles don’t meet your needs, you can customize them using a plugin like “User Role Editor”. This plugin allows you to create new roles with specific capabilities tailored to your requirements.
- Save Changes: After selecting the user role, click the “Add New User” button to create the user account with the assigned role.
- Edit Existing User Roles (Optional): If you need to change the role of an existing user, locate the user in the Users list and hover over their username. Click on the “Edit” option that appears below their username. On the Edit User screen, you can change the user’s role by selecting a new role from the Role dropdown menu.
- Update User Role: After making any changes to the user’s role, be sure to click the “Update User” button to save the changes.
Set user role in WordPress
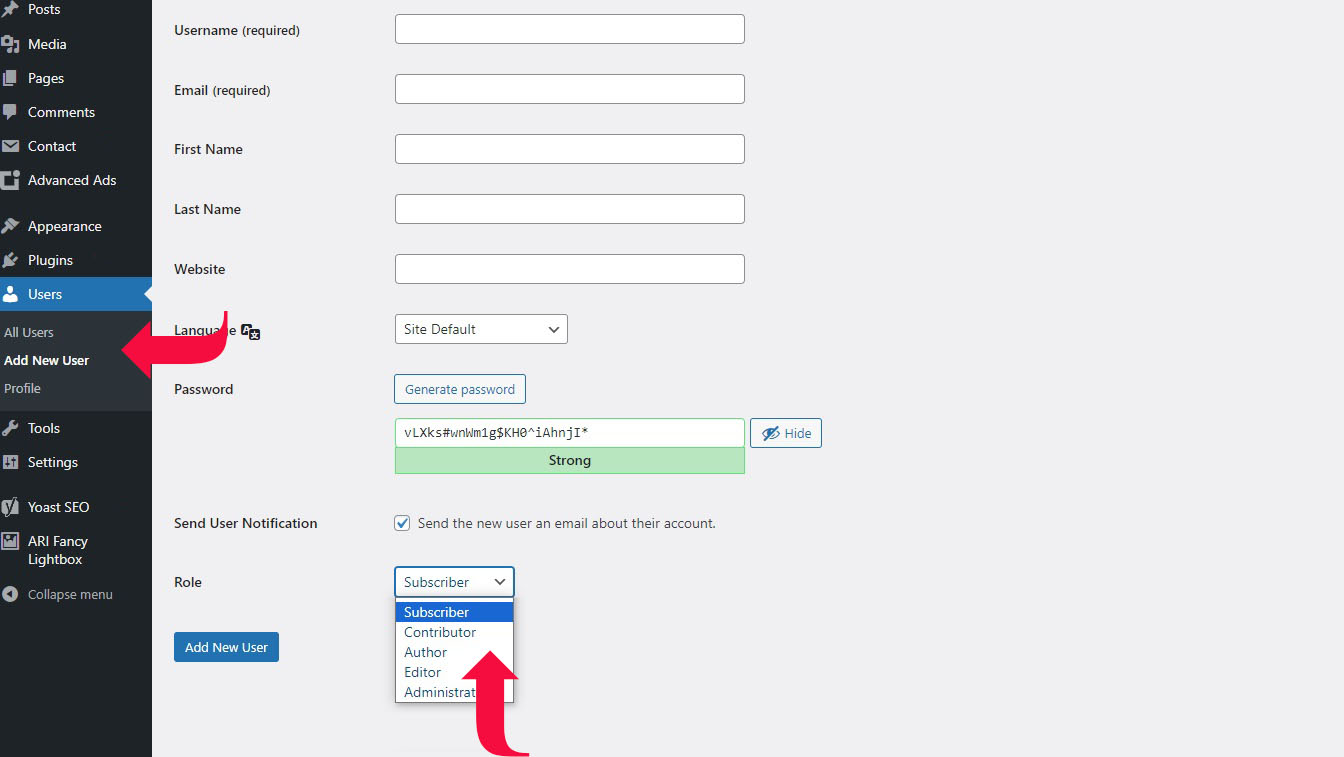
Image by: wordpresstrix.com